L’installazione con Raspberry Noobs è un gioco da ragazzi! Tutto ciò di cui avete bisogno è un RaspberryZeroW e una scheda SD vuota.
Passo 1: Noobs Installer
Scaricate il programma di installazione di Noobs da https://www.raspberrypi.org/downloads/noobs/.
Passo 2: Scheda SD
Scompatta questo archivio zip sulla scheda SD vuota.
Fatto! Ora potete collegare il RaspberryPiZero alla TV. Vedrete quindi il menu di installazione.
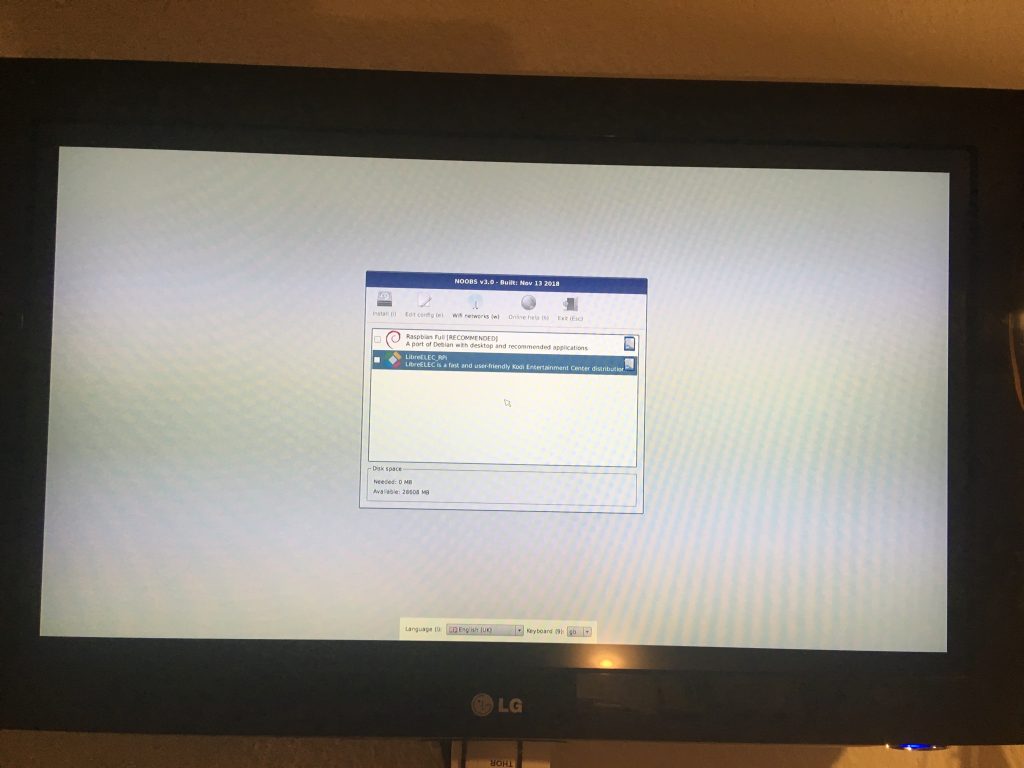
Se hai NoobsLite sulla scheda, devi prima stabilire una connessione WLAN. Poi seleziona “Rasbian Lite” e clicca su “Installa”. Rasbian Lite è la versione server senza un desktop. Dopo l’avvio, la gestione dei pacchetti deve essere aggiornata.
$ sudo apt-get update
$ sudo apt-get install -y nodm matchbox-window-manager uzbl xinit vim
$ sudo adduser dashboard
$ sudo su dashboard
$ sudo vim ~/.xsession
#!/bin/bash
xset s off
xset s noblank
xset -dpms
while true; do
  uzbl -u http://git-lab-ip/host/ -c /home/dashboard/uzbl.conf & exec matchbox-window-manager -use_titlebar no
done
Poi premete il tasto “Esc” per cambiare la modalità di comando e poi “:wq” per “write” e “quit”. Inoltre, questo script richiede i seguenti diritti:
$ chmod 755 ~/.xsession
set config_home = /home/dashboard
set socket_dir=/tmp
set geometry=maximized
set show_status=0
set on_event = request ON_EVENT
@on_event LOAD_FINISH script @config_home/gitlab.js
Tempo di mezzo! Hai quasi finito. Ora avete bisogno di un Javascript con il quale potete simulare il comportamento dell’utente. È importante che tu crei un utente Gitlab separato. Questo utente può essere gestito come “reporter” nei progetti.
var gitlabUrl = 'http://git-lab-url:port';
var gitlabUser = 'userName';
var gitlabPassword = 'userPasswort';

/*--------------------------Timer--------------------------*/

var Timer = function(intervallInMsec)
{
  this.caller = new Array();
  this.intervall = window.setInterval(
    this.call.bind(this),
    intervallInMsec
  );
};

Timer.prototype.append = function(callFunction)
{
  this.caller.push(callFunction);
};

Timer.prototype.remove = function(callFunction)
{
  var index = this.caller.indexOf(callFunction);
  if (index > -1)
  {
    this.caller.splice(index, 1);
  }
};

Timer.prototype.call = function()
{
  for(
    var callerIndex = 0, callerLenght = this.caller.length;
    callerIndex < callerLenght;
    callerIndex++
  ) {
    this.caller[ callerIndex ].call();
  }
};

/* login verhalten */
var timer = new Timer(1000);
timer.append(
  function()
  {
    if (jQuery('#user_login').length > 0)
    {
      jQuery('#user_login').val(gitlabUser);
      jQuery('#user_password').val(gitlabPassword);
      jQuery('.btn-save').click();
    }
  }
);

/* wallboard aufrufen */
timer.append(
  function()
  {
    if (jQuery('.js-projects-list-holder').length > 0)
    {
      window.location.href = window.gitlabUrl + '/dashboard/issues?state=opened&utf8=✓&assignee_id=0';
    }
  }
);
/* reload verhalten */
timer.append(
  function()
  {
    if (jQuery('.issues-filters').length > 0)
    {
      window.location.href = window.gitlabUrl + '/dashboard/issues?state=opened&utf8=✓&assignee_id=0';
    }
  }
);
Ora puoi fare il logout. Cambia l’impostazione di DisplayManager in “/etc/default/nodm”. Qui dovete cambiare “NODM_USER” in “dashboard” e “NODM_ENABLED” in “true”.
# nodm configuration

# Set NODM_ENABLED to something different than 'false' to enable nodm
NODM_ENABLED=true

# User to autologin for
NODM_USER=dashboard

# First vt to try when looking for free VTs
NODM_FIRST_VT=7

# X session
NODM_XSESSION=/etc/X11/Xsession

# Options for nodm itself
NODM_OPTIONS=

# Options for the X server.
#
# Format: [/usr/bin/<Xserver>] [:<disp>] <Xserver-options>
#
# The Xserver executable and the display name can be omitted, but should
# be placed in front, if nodm's defaults shall be overridden.
NODM_X_OPTIONS='-nolisten tcp'

# If an X session will run for less than this time in seconds, nodm will wait an
# increasing bit of time before restarting the session
NODM_MIN_SESSION_TIME=60

# Timeout (in seconds) to wait for X to be ready to accept connections. If X is
# not ready before this timeout, it is killed and restarted.
NODM_X_TIMEOUT=300
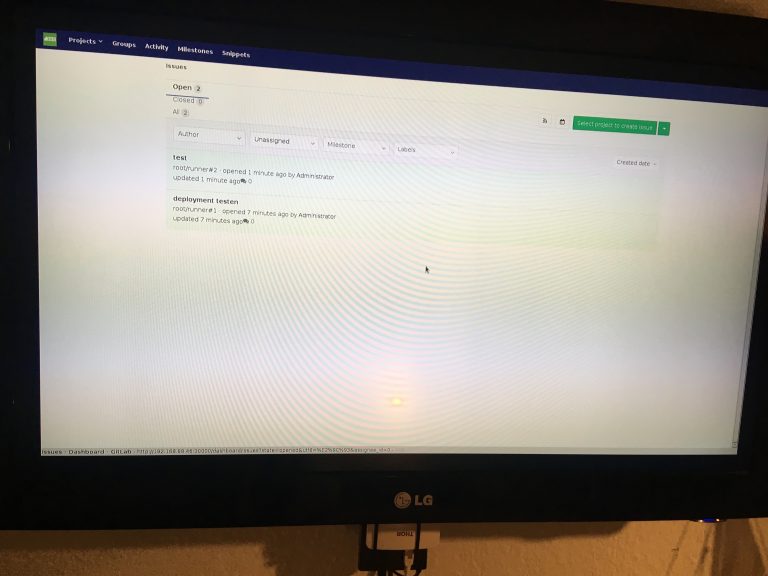
Se ora riavviate con “sudo reboot”, vedrete la seguente dashboard: