Instalação com Raspberry Noobs é uma brincadeira de criança! Tudo que você precisa é um RaspberryZeroW e um cartão SD em branco.
Passo 1: Instalador Noobs
Faça o download do instalador Noobs em https://www.raspberrypi.org/downloads/noobs/.
Passo 2: Cartão SD
Descompacte este arquivo zip no cartão SD vazio.
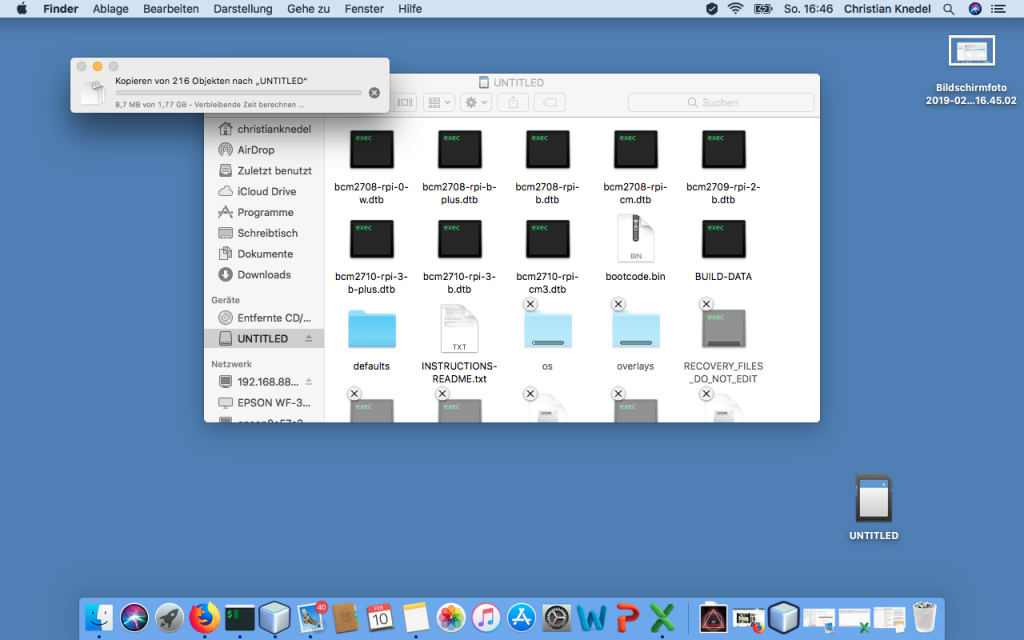
Feito! Agora você pode conectar o RaspberryPiZero à TV. Você verá então o menu de instalação.
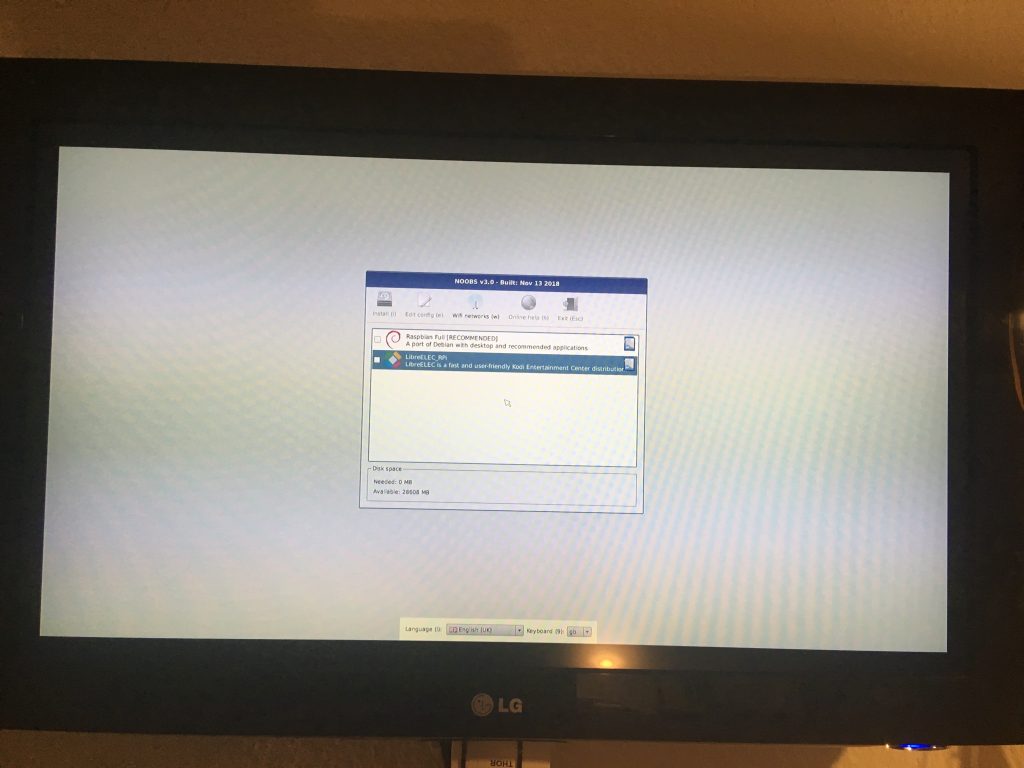
Se você tem NoobsLite no cartão, você deve primeiro estabelecer uma conexão WLAN. Depois selecione “Rasbian Lite” e clique em “Instalar”. O Rasbian Lite é a versão para servidor sem desktop. Após a inicialização, o gerenciamento do pacote deve ser atualizado.
$ sudo apt-get update
$ sudo apt-get install -y nodm matchbox-window-manager uzbl xinit vim
$ sudo adduser dashboard
$ sudo su dashboard
$ sudo vim ~/.xsession
#!/bin/bash
xset s off
xset s noblank
xset -dpms
while true; do
  uzbl -u http://git-lab-ip/host/ -c /home/dashboard/uzbl.conf & exec matchbox-window-manager -use_titlebar no
done
Depois pressione a tecla “Esc” para mudar o modo de comando e depois “:wq” para “write” e “quit”. Além disso, este roteiro requer os seguintes direitos:
$ chmod 755 ~/.xsession
set config_home = /home/dashboard
set socket_dir=/tmp
set geometry=maximized
set show_status=0
set on_event = request ON_EVENT
@on_event LOAD_FINISH script @config_home/gitlab.js
Meio tempo! Estás quase a acabar. Agora você precisa de um Javascript com o qual você pode simular o comportamento do usuário. É importante que você crie um usuário separado do Gitlab. Este usuário pode ser gerenciado como um “repórter” em projetos.
var gitlabUrl = 'http://git-lab-url:port';
var gitlabUser = 'userName';
var gitlabPassword = 'userPasswort';

/*--------------------------Timer--------------------------*/

var Timer = function(intervallInMsec)
{
  this.caller = new Array();
  this.intervall = window.setInterval(
    this.call.bind(this),
    intervallInMsec
  );
};

Timer.prototype.append = function(callFunction)
{
  this.caller.push(callFunction);
};

Timer.prototype.remove = function(callFunction)
{
  var index = this.caller.indexOf(callFunction);
  if (index > -1)
  {
    this.caller.splice(index, 1);
  }
};

Timer.prototype.call = function()
{
  for(
    var callerIndex = 0, callerLenght = this.caller.length;
    callerIndex < callerLenght;
    callerIndex++
  ) {
    this.caller[ callerIndex ].call();
  }
};

/* login verhalten */
var timer = new Timer(1000);
timer.append(
  function()
  {
    if (jQuery('#user_login').length > 0)
    {
      jQuery('#user_login').val(gitlabUser);
      jQuery('#user_password').val(gitlabPassword);
      jQuery('.btn-save').click();
    }
  }
);

/* wallboard aufrufen */
timer.append(
  function()
  {
    if (jQuery('.js-projects-list-holder').length > 0)
    {
      window.location.href = window.gitlabUrl + '/dashboard/issues?state=opened&utf8=✓&assignee_id=0';
    }
  }
);
/* reload verhalten */
timer.append(
  function()
  {
    if (jQuery('.issues-filters').length > 0)
    {
      window.location.href = window.gitlabUrl + '/dashboard/issues?state=opened&utf8=✓&assignee_id=0';
    }
  }
);
Agora já podes sair. Por favor altere a configuração do DisplayManager em “/etc/default/nodm”. Aqui você deve mudar o “NODM_USER” para “dashboard” e “NODM_ENABLED” para “true”.
# nodm configuration

# Set NODM_ENABLED to something different than 'false' to enable nodm
NODM_ENABLED=true

# User to autologin for
NODM_USER=dashboard

# First vt to try when looking for free VTs
NODM_FIRST_VT=7

# X session
NODM_XSESSION=/etc/X11/Xsession

# Options for nodm itself
NODM_OPTIONS=

# Options for the X server.
#
# Format: [/usr/bin/<Xserver>] [:<disp>] <Xserver-options>
#
# The Xserver executable and the display name can be omitted, but should
# be placed in front, if nodm's defaults shall be overridden.
NODM_X_OPTIONS='-nolisten tcp'

# If an X session will run for less than this time in seconds, nodm will wait an
# increasing bit of time before restarting the session
NODM_MIN_SESSION_TIME=60

# Timeout (in seconds) to wait for X to be ready to accept connections. If X is
# not ready before this timeout, it is killed and restarted.
NODM_X_TIMEOUT=300
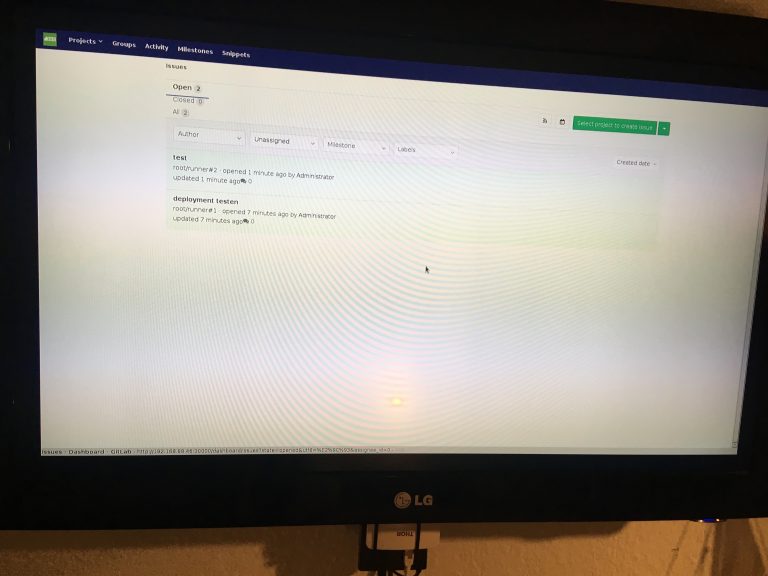
Se você agora reiniciar com “sudo reboot”, você verá o seguinte painel de instrumentos: