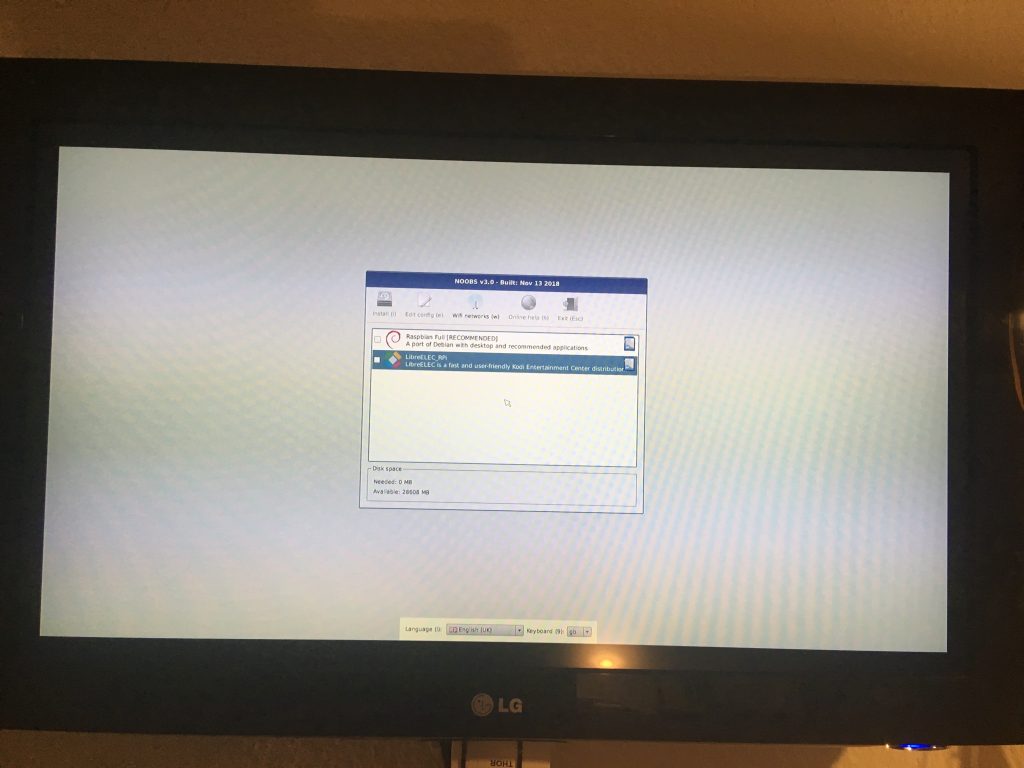
Instalarea cu Raspberry Noobs este o joacă de copii! Tot ce aveți nevoie este un RaspberryZeroW și un card SD gol.
Pasul 1: Noobs Installer
Descărcați programul de instalare Noobs de pe https://www.raspberrypi.org/downloads/noobs/.
Pasul 2: Card SD
Despachetați această arhivă zip pe cardul SD gol.
Gata! Acum puteți conecta RaspberryPiZero la televizor. Veți vedea apoi meniul de instalare.
Dacă aveți NoobsLite pe card, trebuie mai întâi să stabiliți o conexiune WLAN. Apoi selectați “Rasbian Lite” și faceți clic pe “Install”. Rasbian Lite este versiunea de server fără desktop. După pornire, gestionarea pachetelor trebuie actualizată.
$ sudo apt-get update
$ sudo apt-get install -y nodm matchbox-window-manager uzbl xinit vim
$ sudo adduser dashboard
$ sudo su dashboard
$ sudo vim ~/.xsession
#!/bin/bash
xset s off
xset s noblank
xset -dpms
while true; do
  uzbl -u http://git-lab-ip/host/ -c /home/dashboard/uzbl.conf & exec matchbox-window-manager -use_titlebar no
done
Apoi apăsați tasta “Esc” pentru a schimba modul de comandă și apoi “:wq” pentru “write” și “quit”. În plus, acest script necesită următoarele drepturi:
$ chmod 755 ~/.xsession
set config_home = /home/dashboard
set socket_dir=/tmp
set geometry=maximized
set show_status=0
set on_event = request ON_EVENT
@on_event LOAD_FINISH script @config_home/gitlab.js
Pauză! Aproape ați terminat. Acum aveți nevoie de un Javascript cu ajutorul căruia să puteți simula comportamentul utilizatorului. Este important să creați un utilizator Gitlab separat. Acest utilizator poate fi gestionat ca “reporter” în cadrul proiectelor.
var gitlabUrl = 'http://git-lab-url:port';
var gitlabUser = 'userName';
var gitlabPassword = 'userPasswort';

/*--------------------------Timer--------------------------*/

var Timer = function(intervallInMsec)
{
  this.caller = new Array();
  this.intervall = window.setInterval(
    this.call.bind(this),
    intervallInMsec
  );
};

Timer.prototype.append = function(callFunction)
{
  this.caller.push(callFunction);
};

Timer.prototype.remove = function(callFunction)
{
  var index = this.caller.indexOf(callFunction);
  if (index > -1)
  {
    this.caller.splice(index, 1);
  }
};

Timer.prototype.call = function()
{
  for(
    var callerIndex = 0, callerLenght = this.caller.length;
    callerIndex < callerLenght;
    callerIndex++
  ) {
    this.caller[ callerIndex ].call();
  }
};

/* login verhalten */
var timer = new Timer(1000);
timer.append(
  function()
  {
    if (jQuery('#user_login').length > 0)
    {
      jQuery('#user_login').val(gitlabUser);
      jQuery('#user_password').val(gitlabPassword);
      jQuery('.btn-save').click();
    }
  }
);

/* wallboard aufrufen */
timer.append(
  function()
  {
    if (jQuery('.js-projects-list-holder').length > 0)
    {
      window.location.href = window.gitlabUrl + '/dashboard/issues?state=opened&utf8=✓&assignee_id=0';
    }
  }
);
/* reload verhalten */
timer.append(
  function()
  {
    if (jQuery('.issues-filters').length > 0)
    {
      window.location.href = window.gitlabUrl + '/dashboard/issues?state=opened&utf8=✓&assignee_id=0';
    }
  }
);
Acum vă puteți deconecta. Vă rugăm să modificați setarea DisplayManager din “/etc/default/nodm”. Aici trebuie să modificați “NODM_USER” la “dashboard” și “NODM_ENABLED” la “true”.
# nodm configuration

# Set NODM_ENABLED to something different than 'false' to enable nodm
NODM_ENABLED=true

# User to autologin for
NODM_USER=dashboard

# First vt to try when looking for free VTs
NODM_FIRST_VT=7

# X session
NODM_XSESSION=/etc/X11/Xsession

# Options for nodm itself
NODM_OPTIONS=

# Options for the X server.
#
# Format: [/usr/bin/<Xserver>] [:<disp>] <Xserver-options>
#
# The Xserver executable and the display name can be omitted, but should
# be placed in front, if nodm's defaults shall be overridden.
NODM_X_OPTIONS='-nolisten tcp'

# If an X session will run for less than this time in seconds, nodm will wait an
# increasing bit of time before restarting the session
NODM_MIN_SESSION_TIME=60

# Timeout (in seconds) to wait for X to be ready to accept connections. If X is
# not ready before this timeout, it is killed and restarted.
NODM_X_TIMEOUT=300
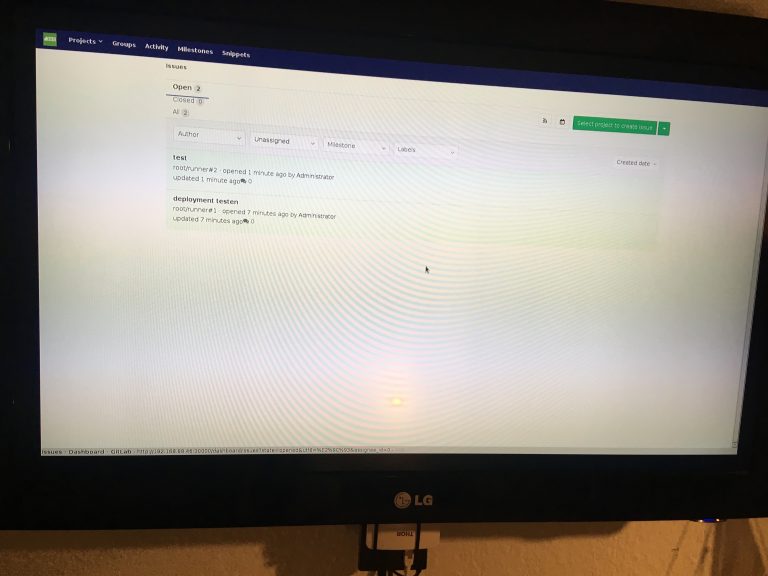
Dacă acum reporniți cu “sudo reboot”, veți vedea următorul tablou de bord: