Namestitev z Raspberry Noobs je otroško lahka! Vse, kar potrebujete, sta RaspberryZeroW in prazna kartica SD.
Korak 1: Namestitveni program Noobs
S spletne strani https://www.raspberrypi.org/downloads/noobs/ prenesite namestitveni program Noobs.
Korak 2: Kartica SD
Ta arhiv zip razpakirajte na prazno kartico SD.
Končano! Zdaj lahko RaspberryPiZero povežete s televizorjem. Nato se prikaže meni za namestitev.
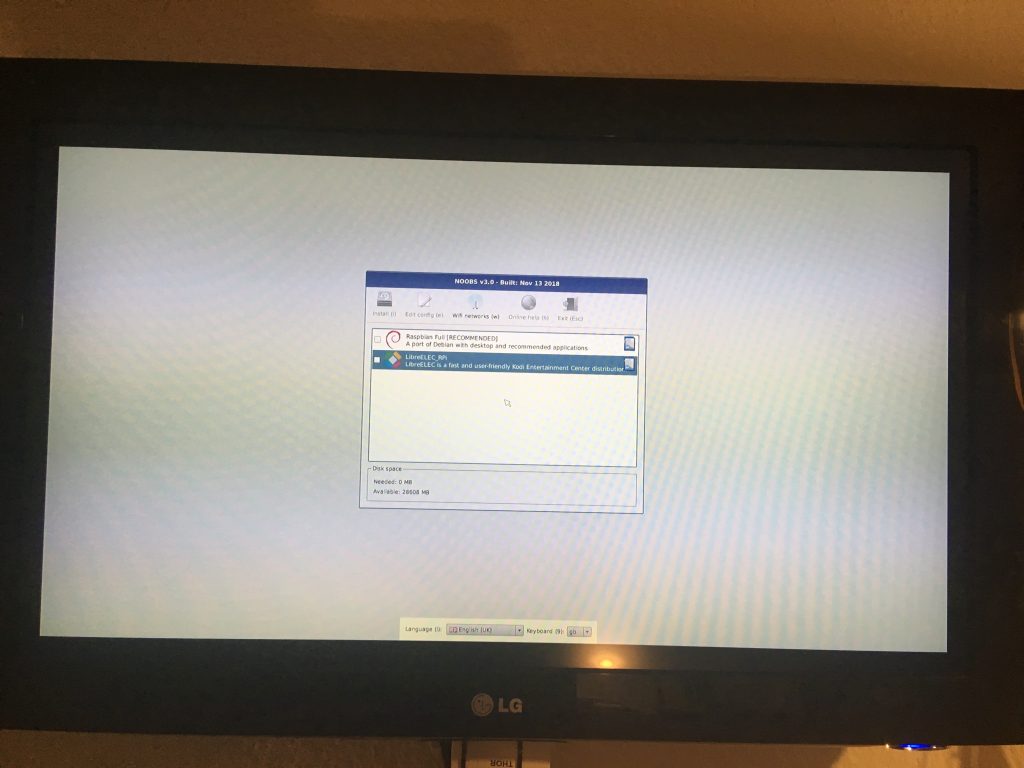
Če je na kartici nameščen program NoobsLite, morate najprej vzpostaviti povezavo WLAN. Nato izberite “Rasbian Lite” in kliknite “Namesti”. Rasbian Lite je različica strežnika brez namizja. Po zagonu je treba posodobiti upravljanje paketov.
$ sudo apt-get update
$ sudo apt-get install -y nodm matchbox-window-manager uzbl xinit vim
$ sudo adduser dashboard
$ sudo su dashboard
$ sudo vim ~/.xsession
#!/bin/bash
xset s off
xset s noblank
xset -dpms
while true; do
  uzbl -u http://git-lab-ip/host/ -c /home/dashboard/uzbl.conf & exec matchbox-window-manager -use_titlebar no
done
Nato pritisnite tipko “Esc”, da spremenite način ukaza, in nato “:wq” za “write” in “quit”. Poleg tega ta skripta zahteva naslednje pravice:
$ chmod 755 ~/.xsession
set config_home = /home/dashboard
set socket_dir=/tmp
set geometry=maximized
set show_status=0
set on_event = request ON_EVENT
@on_event LOAD_FINISH script @config_home/gitlab.js
Polčas! Skoraj ste končali. Zdaj potrebujete Javascript, s katerim lahko simulirate vedenje uporabnikov. Pomembno je, da ustvarite ločenega uporabnika Gitlab. Tega uporabnika lahko v projektih upravljate kot “poročevalca”.
var gitlabUrl = 'http://git-lab-url:port';
var gitlabUser = 'userName';
var gitlabPassword = 'userPasswort';

/*--------------------------Timer--------------------------*/

var Timer = function(intervallInMsec)
{
  this.caller = new Array();
  this.intervall = window.setInterval(
    this.call.bind(this),
    intervallInMsec
  );
};

Timer.prototype.append = function(callFunction)
{
  this.caller.push(callFunction);
};

Timer.prototype.remove = function(callFunction)
{
  var index = this.caller.indexOf(callFunction);
  if (index > -1)
  {
    this.caller.splice(index, 1);
  }
};

Timer.prototype.call = function()
{
  for(
    var callerIndex = 0, callerLenght = this.caller.length;
    callerIndex < callerLenght;
    callerIndex++
  ) {
    this.caller[ callerIndex ].call();
  }
};

/* login verhalten */
var timer = new Timer(1000);
timer.append(
  function()
  {
    if (jQuery('#user_login').length > 0)
    {
      jQuery('#user_login').val(gitlabUser);
      jQuery('#user_password').val(gitlabPassword);
      jQuery('.btn-save').click();
    }
  }
);

/* wallboard aufrufen */
timer.append(
  function()
  {
    if (jQuery('.js-projects-list-holder').length > 0)
    {
      window.location.href = window.gitlabUrl + '/dashboard/issues?state=opened&utf8=✓&assignee_id=0';
    }
  }
);
/* reload verhalten */
timer.append(
  function()
  {
    if (jQuery('.issues-filters').length > 0)
    {
      window.location.href = window.gitlabUrl + '/dashboard/issues?state=opened&utf8=✓&assignee_id=0';
    }
  }
);
Zdaj se lahko odjavite. Spremenite nastavitev DisplayManager pod “/etc/default/nodm”. Tukaj morate spremeniti “NODM_USER” na “dashboard” in “NODM_ENABLED” na “true”.
# nodm configuration

# Set NODM_ENABLED to something different than 'false' to enable nodm
NODM_ENABLED=true

# User to autologin for
NODM_USER=dashboard

# First vt to try when looking for free VTs
NODM_FIRST_VT=7

# X session
NODM_XSESSION=/etc/X11/Xsession

# Options for nodm itself
NODM_OPTIONS=

# Options for the X server.
#
# Format: [/usr/bin/<Xserver>] [:<disp>] <Xserver-options>
#
# The Xserver executable and the display name can be omitted, but should
# be placed in front, if nodm's defaults shall be overridden.
NODM_X_OPTIONS='-nolisten tcp'

# If an X session will run for less than this time in seconds, nodm will wait an
# increasing bit of time before restarting the session
NODM_MIN_SESSION_TIME=60

# Timeout (in seconds) to wait for X to be ready to accept connections. If X is
# not ready before this timeout, it is killed and restarted.
NODM_X_TIMEOUT=300
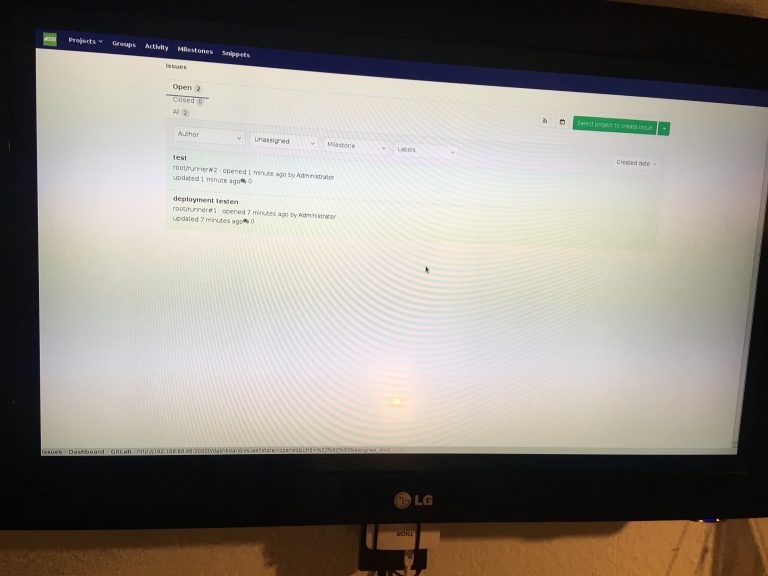
Če zdaj ponovno zaženete računalnik z ukazom “sudo reboot”, boste videli naslednjo nadzorno ploščo: