Today I am installing a new Kubenetes cluster and there is a lot to do!
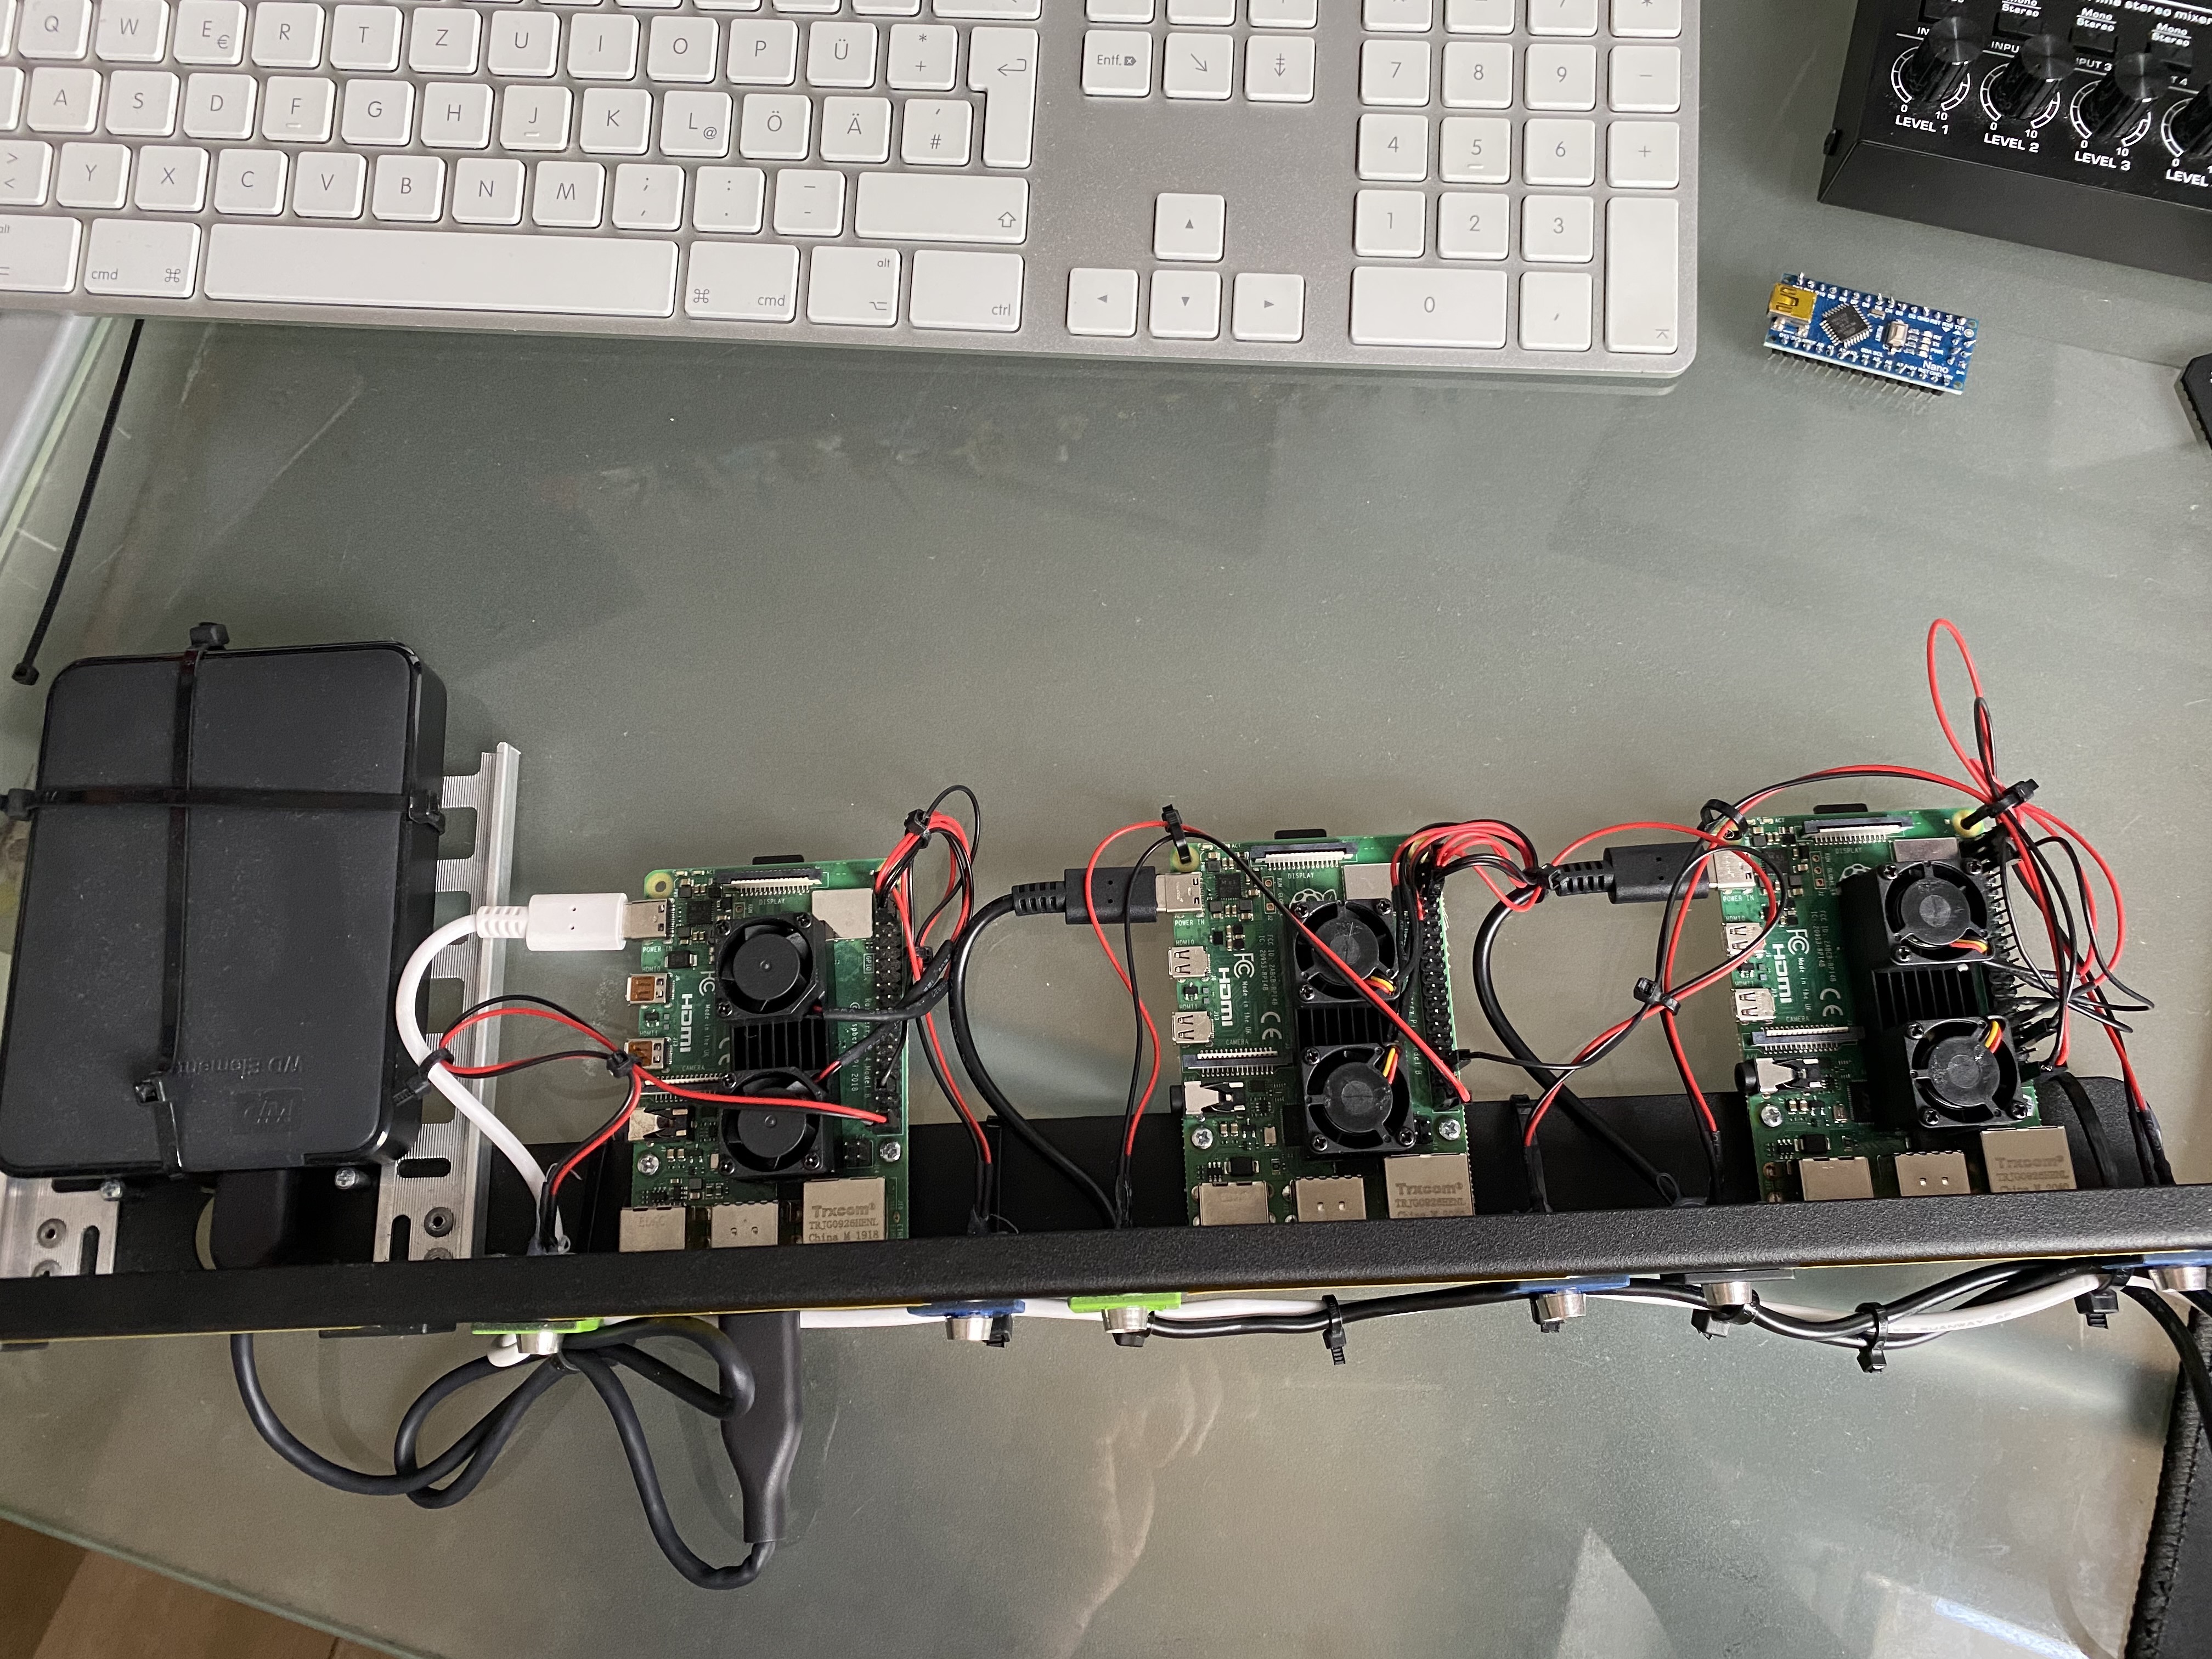
I ordered these components for it:
- 1x WDBU6Y0050BBK WD Elements portable 5TB: https://www.reichelt.de/wd-elements-portable-5tb-wdbu6y0050bbk-p270625.html?
- 3x fan, dual: https://www.reichelt.de/raspberry-pi-luefter-dual-rpi-fan-dual-p223618.html?
- 1x Raspberry 4 / 4GB Ram: https://www.reichelt.de/raspberry-pi-4-b-4x-1-5-ghz-4-gb-ram-wlan-bt-rasp-pi-4-b-4gb-p259920.html?
- 2x Raspberry 4 / 8GB Ram: https://www.reichelt.de/raspberry-pi-4-b-4x-1-5-ghz-8-gb-ram-wlan-bt-rasp-pi-4-b-8gb-p276923.html?
- 3x Power supplies: https://www.reichelt.de/raspberry-pi-netzteil-5-1-v-3-0-a-usb-type-c-eu-stecker-s-rpi-ps-15w-bk-eu-p260010.html
- 1x Rackmount: https://amzn.to/3H8vOg7
- 1x 600 pieces Dupont plug kit: https://amzn.to/3kcfYqQ
- 1x green LED with series resistor: https://amzn.to/3EQgXVp
- 1x blue LED with series resistor: https://amzn.to/31ChYSO
- 10x Marquardt 203.007.013 Blanking piece Black: https://www.voelkner.de/products/215024/Marquardt-203.007.013-Blindstueck-Schwarz.html
- 1x Lamp socket: https://amzn.to/3H0UZkG
Let’s go!
I have created my own image for the installation based on the Raspian Lite installation. In this my user/public key is already stored and the “/boot/config.txt” file is adapted for my LEDs.
# meine Server brauchen kein HDMI, WLAN und Bluetooth
dtoverlay=disable-bt
dtoverlay=disable-wifi
disable_splash=1
hdmi_blanking=1
hdmi_ignore_hotplug=1
hdmi_ignore_composite=1


# Status-LEDs an GPIO weiterleiten
dtoverlay=act-led,gpio=21
dtparam=act_led_trigger=cpu0
Server 1 - Mount disk
First, I install an NFS service on “Server 1”. This storage can be used later for my container cluster. I connected the USB hard disk to “Server 1” and formatted it EXT4 using these instructions: https://homecircuits.eu/blog/mount-sata-cubieboard-lubuntu/ After that I created a mountpoint for the USB disk:
$ sudo mkdir /media/usb-platte
/dev/sda1 /media/usb-platte ext4 defaults 0 2
The setting can be checked with “sudo mount -a”. Now the USB disk should be mounted under “/media/usb-disk”.
Install NFS
For NFS this package is required:
$ sudo apt-get install nfs-kernel-server -y
In addition, a new folder was created on the USB disk
$ sudo mkdir /media/usb-platte/nfsshare
$ sudo chown -R pi:pi /media/usb-platte/nfsshare/
$ sudo find /media/usb-platte/nfsshare/ -type d -exec chmod 755 {} \;
$ sudo find /media/usb-platte/nfsshare/ -type f -exec chmod 644 {} \;
After that the “/etc/exports” file must be edited. There the path, the user ID and the group ID are entered:
/media/usb-platte/nfsshare *(rw,all_squash,insecure,async,no_subtree_check,anonuid=1000,anongid=1000)
Now the setting can be applied as follows.
$ sudo exportfs -ra
How can I mount the NFS?
I can mount the volume as follows:
$ sudo mount -t nfs SERVER-1-IP:/media/usb-platte/nfsshare /mnt/nfs
SERVER-1-IP:/media/usb-platte/nfsshare /mnt/nfs/ nfs defaults 0 0
Again, I can use “sudo mount -a”.
Install Kubernetes
The following commands need to be executed on Server 1, Server 2, and Server 3. First, we install Docker and add the user “PI” to the Docker group.
$ curl -sSL get.docker.com | sh
$ sudo usermod pi -aG docker
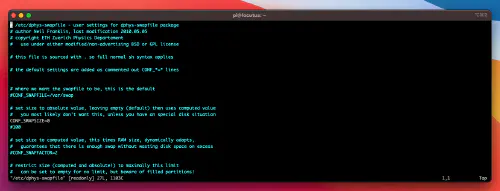
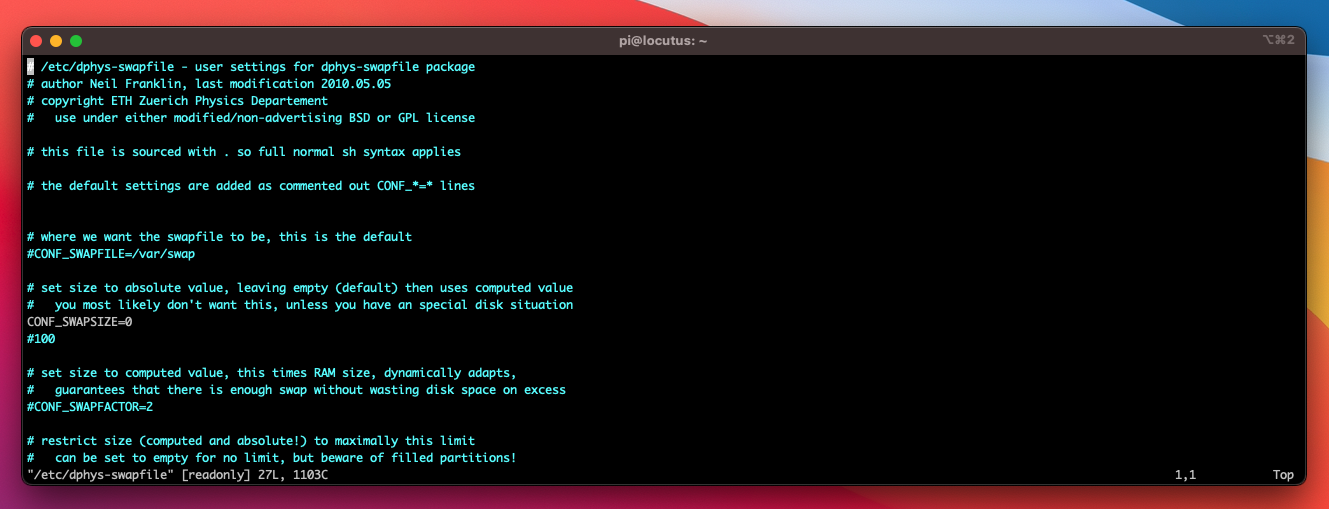
After that, the swap size setting is zeroed on all servers. This means that I edit the “/etc/dphys-swapfile” file and set the “CONF_SWAPSIZE” attribute to “0”.
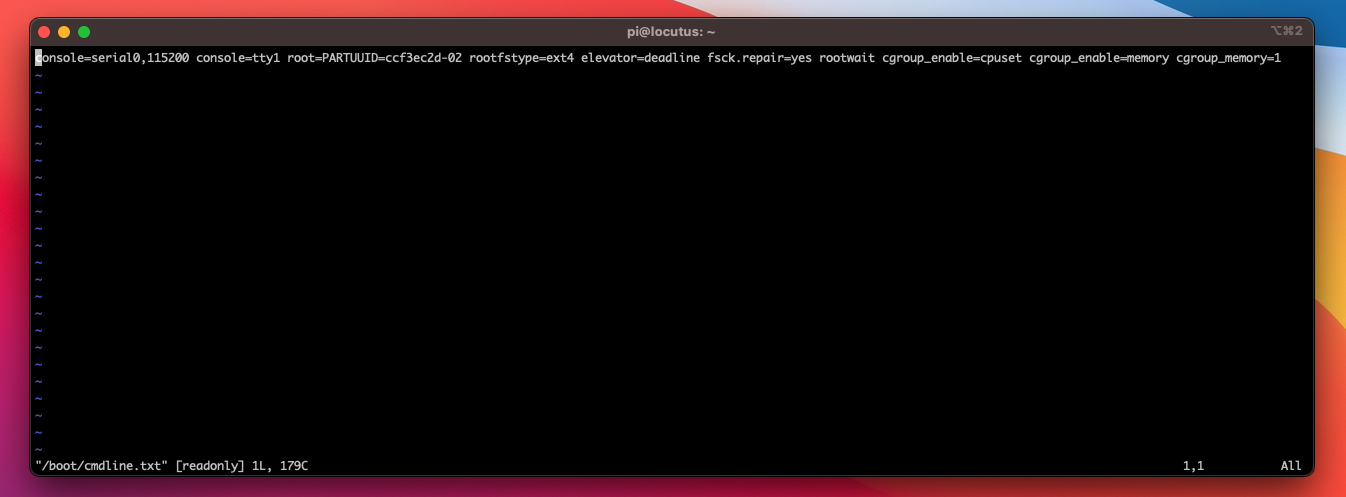
In addition, the “Control-Group” settings in the “/boot/cmdline.txt” file must be adjusted:
cgroup_enable=cpuset cgroup_enable=memory cgroup_memory=1
See:
Now all Raspberry should reboot once and are ready for the Kubernetes installation afterwards.
After reboot I install these packages on server 1, server 2 and server 3:$ sudo reboot
$ curl -s https://packages.cloud.google.com/apt/doc/apt-key.gpg | sudo apt-key add - && \
$ echo "deb http://apt.kubernetes.io/ kubernetes-xenial main" | sudo tee /etc/apt/sources.list.d/kubernetes.list && \
$ sudo apt-get update -q && sudo apt-get install -qy kubeadm
# Server 1 only
Now the Kubenetes master can be initialized.
$ sudo kubeadm init --token-ttl=0 --pod-network-cidr=10.244.0.0/16
$ mkdir -p $HOME/.kube
$ sudo cp -i /etc/kubernetes/admin.conf $HOME/.kube/config
$ sudo chown $(id -u):$(id -g) $HOME/.kube/config
$ kubectl apply https://raw.githubusercontent.com/coreos/flannel/2140ac876ef134e0ed5af15c65e414cf26827915/Documentation/kube-flannel.yml
$ sudo systemctl daemon-reload
$ systemctl restart kubelet
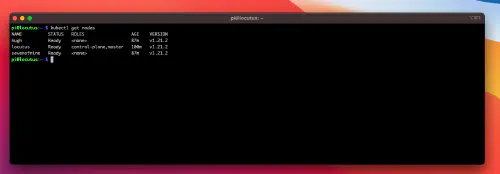
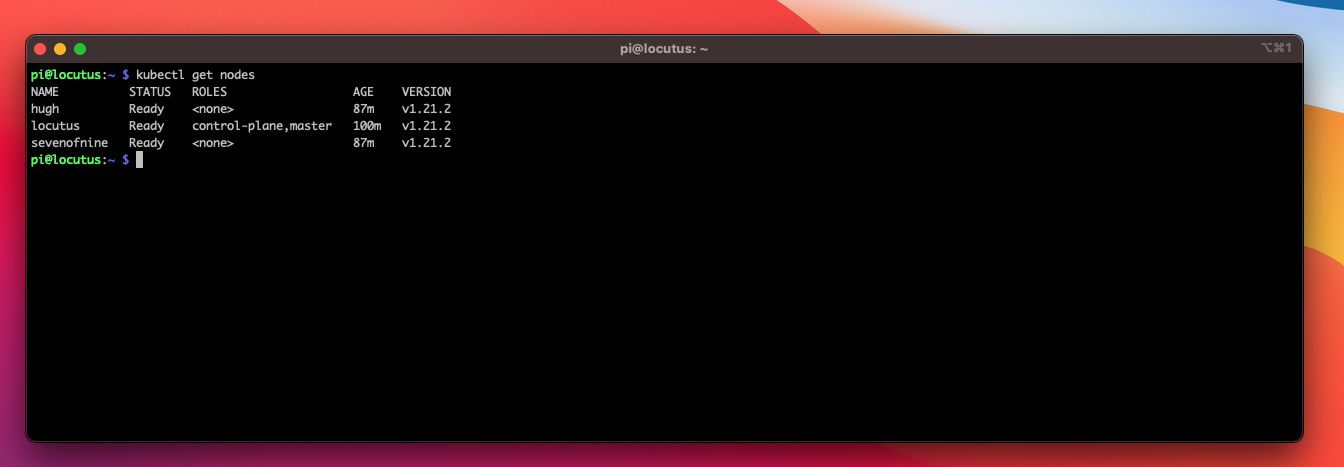
The command “kubectl get nodes” should now show the “Master” in “Ready” status.
Kubernetes - Add Nodes
Now we need the “kubeadm join” command from the kubenetes initialization. I enter this command on “Server 2” and “Server 3”.
$ kubeadm join master-ip:port --token r4fddsfjdsjsdfomsfdoi --discovery-token-ca-cert-hash sha256:1adea3bfxfdfddfdfxfdfsdffsfdsdf946da811c27d1807aa
$ kubectl apply -f https://raw.githubusercontent.com/coreos/flannel/2140ac876ef134e0ed5af15c65e414cf26827915/Documentation/kube-flannel.yml
After that I see all nodes ready for use.
Small test deplyment (Server 1/Kubenetes master)
I write myself a small test deployment and check the functions. I create a “nginx.yml” file with the following content:
apiVersion: apps/v1
kind: Deployment
metadata:
  name: my-nginx
spec:
 selector:
   matchLabels:
     run: my-nginx
 replicas: 2
 template:
   metadata:
     labels:
       run: my-nginx
   spec:
     containers:
     - name: my-nginx
       image: nginx
       ports:
       - containerPort: 80
Now I start the deplyment:
$ kubectl apply -f nginx.yml
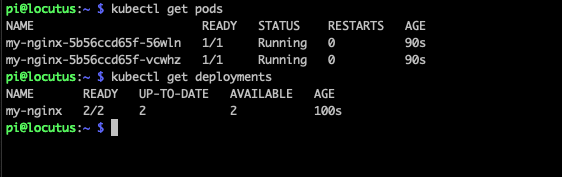
$ kubectl rollout status deployment/my-nginx
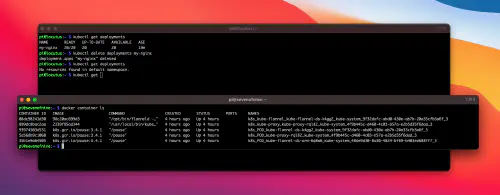
$ kubectl get deplyments
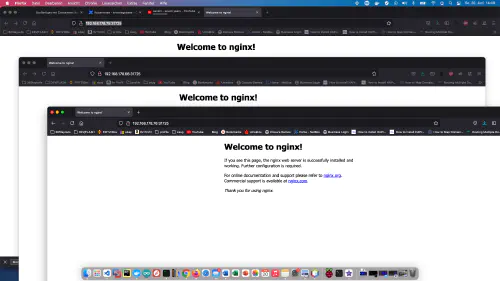
Great!


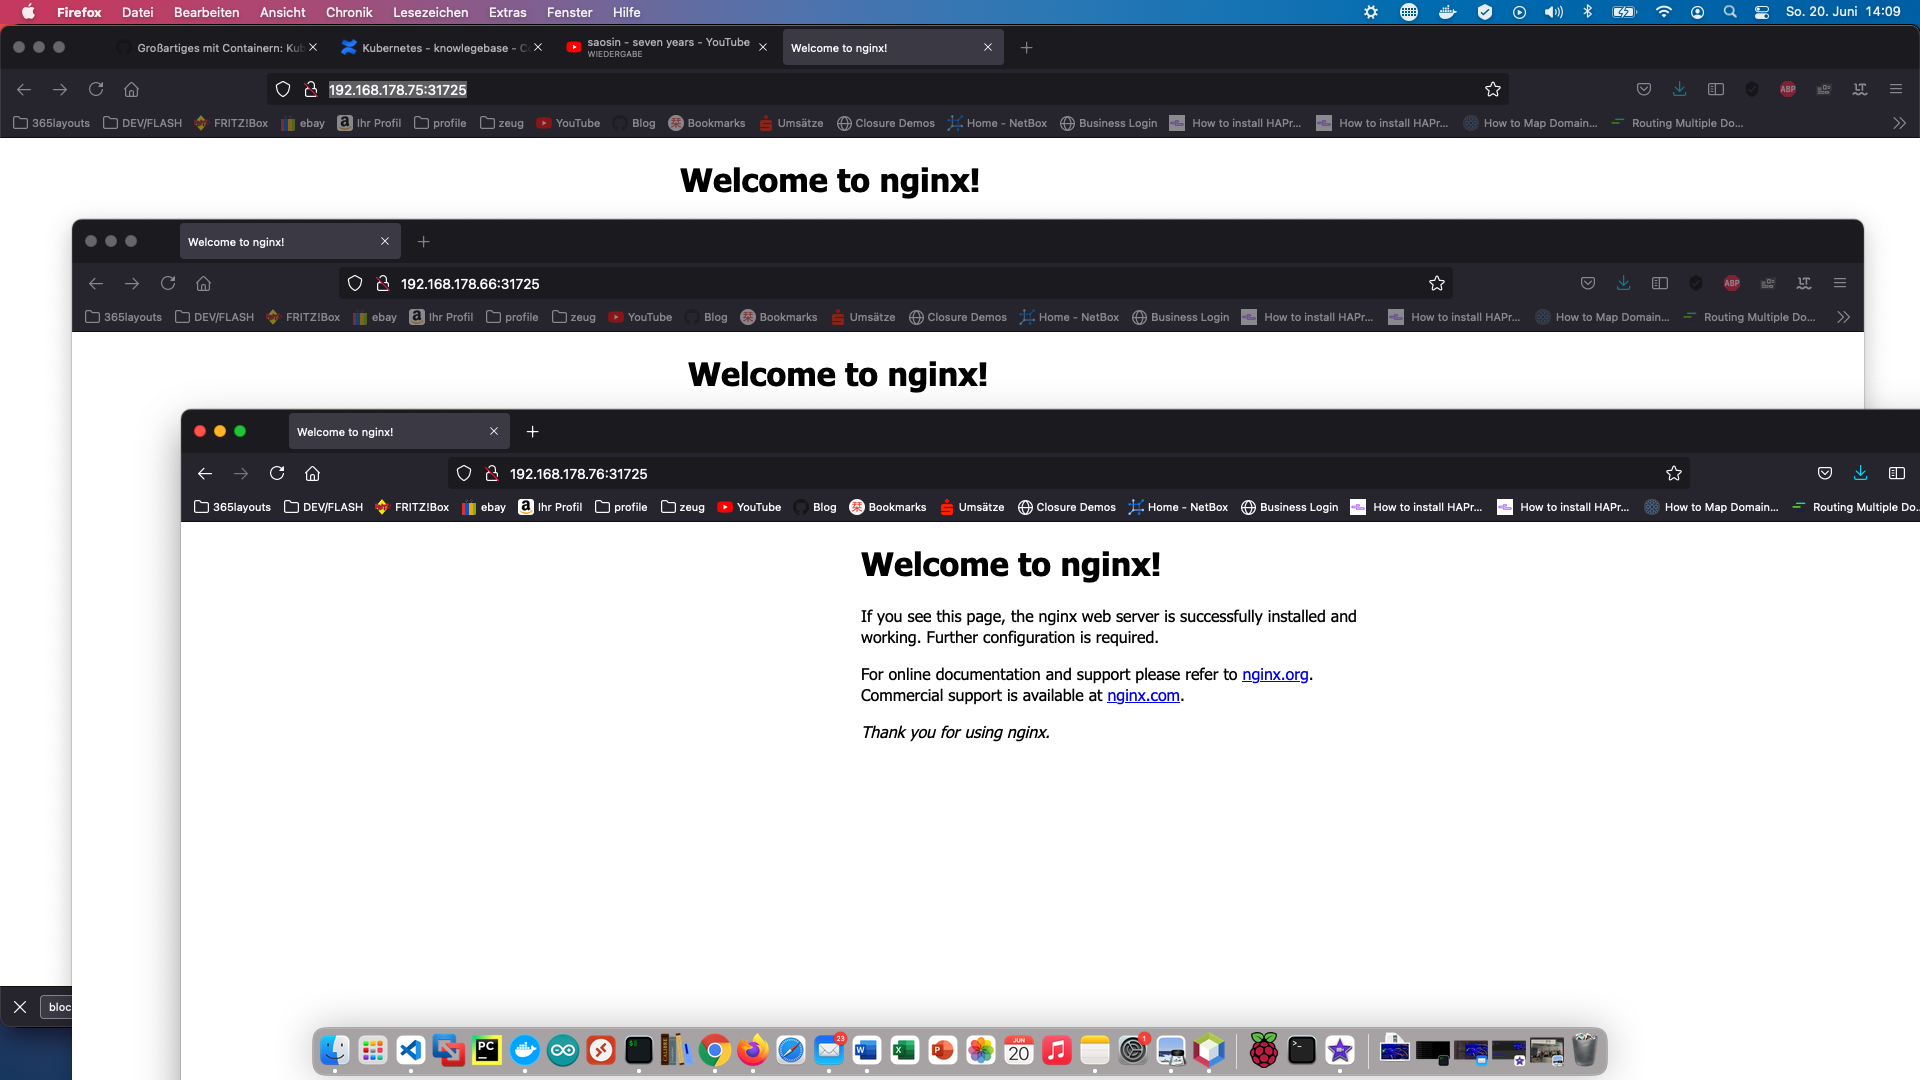
I create a service and can call my container.

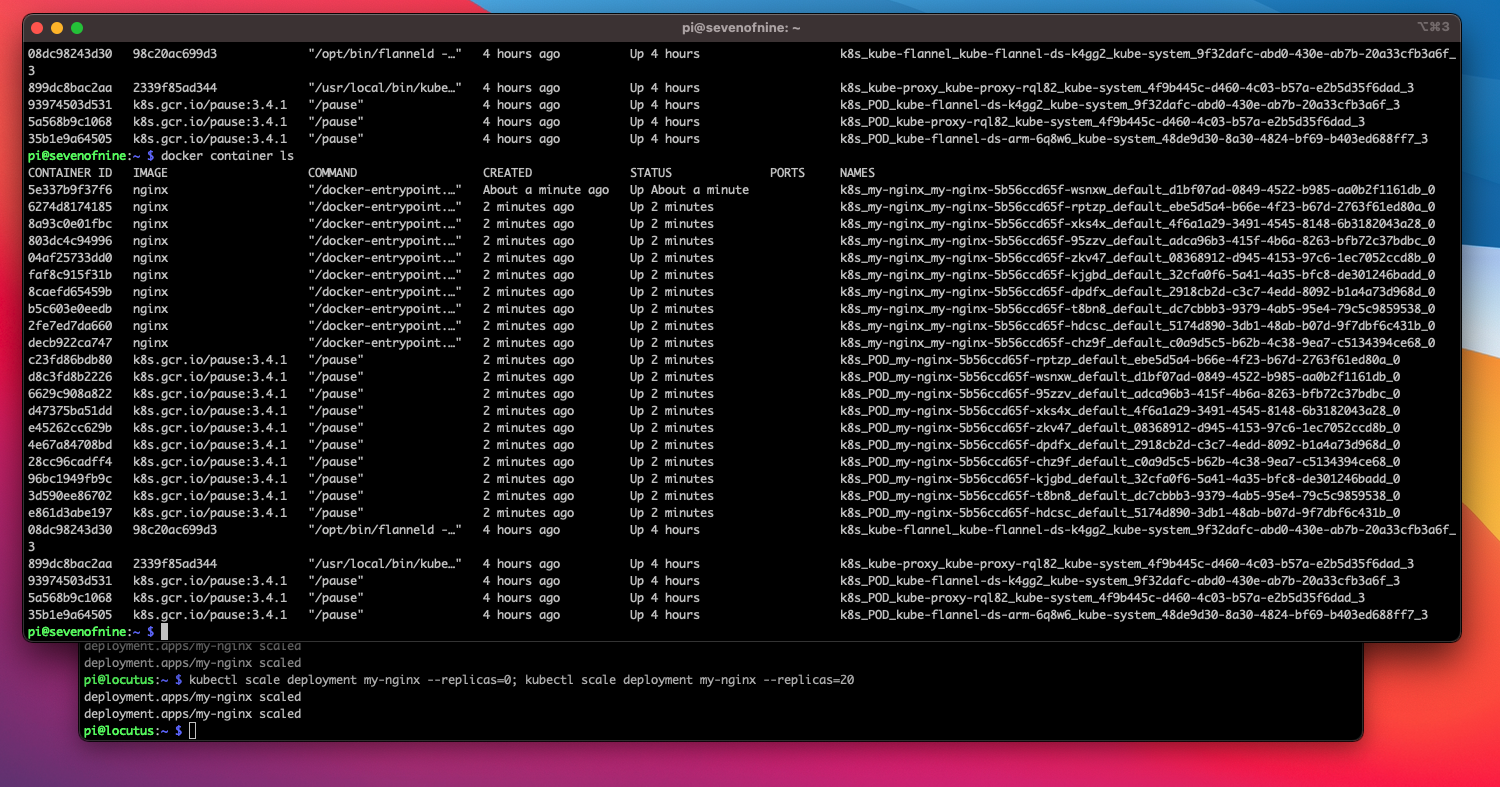
I scale up once to 20 “replicas”:See:$ kubectl scale deployment my-nginx --replicas=0; kubectl scale deployment my-nginx --replicas=20


Clean up test deplyment
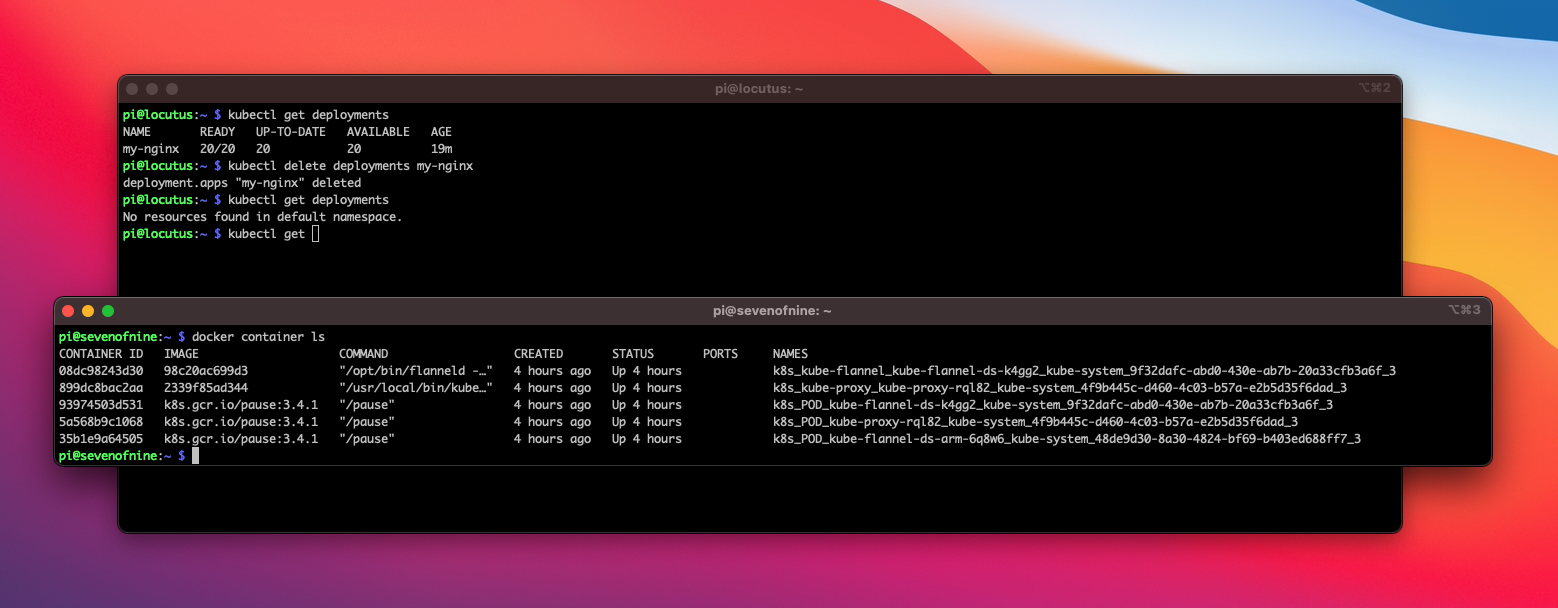
To clean up, I delete the deplyment and the service again.
$ kubectl delete service example-service
$ kubectl delete deplyments my-nginx
See: