8
results
for raspberry-pi
-
难度等级: 很有运动精神
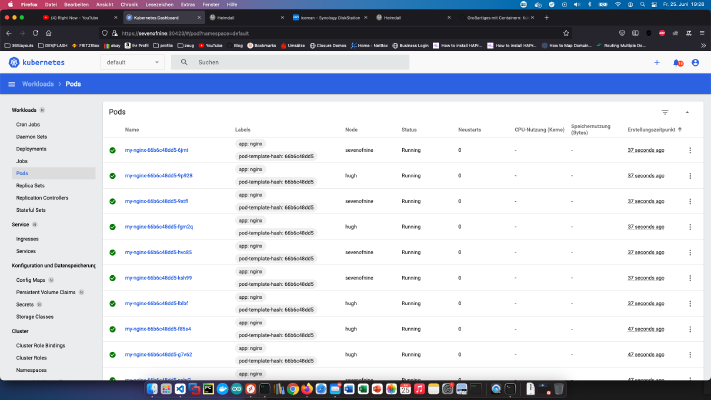 在容器的伟大之处:Kubenetes集群和NFS存储教程中创建了一个Kubernetes集群后,我想安装一个Kubernetes仪表板。 这个命令包含我的项目所需要的一切。 x – + Terminal $ kubectl apply -f https://raw.githubusercontent.com/kubernetes/dashboard/v2.2.0/aio/deploy/recommended.yaml 由于相关服务不能从外部访问,".spec.type “节点仍然必须被改变。 x – + Terminal $ kubectl -n kube-system edit service kubernetes-dashboard --namespace=kubernetes-dashboard 节点”.spec.type “必须是 “NodePort”。 之后,仪表盘已经可以访问。 为了获得访问令牌,人们必须搜索部署控制器的密钥。 x – + Terminal $ kubectl -n kube-system get secret | grep deployment-controller-token 然后你就可以显示和复制该令牌。 x – + Terminal $ kubectl -n kube-system describe secret deployment-controller-token-g7qdm
 -
难度等级: 不太容易,也不太难
 在容器的伟大之处:Kubenetes集群和NFS存储教程中创建了一个Kubernetes集群后,我现在希望能够通过Ansible解决这些计算机。 为此需要一个新的钥匙。 x – + Terminal $ ssh-keygen -b 4096 在所有服务器(服务器1、服务器2和服务器3)的"/home/pi/.ssh/authorised_keys “文件中添加了新的公钥。此外,Ansible必须安装这个包。 x – + Terminal $ sudo apt-get install -y ansible 之后,必须在”/etc/ansible/hosts “文件中输入Raspberrys。 [raspi-kube.clust] ip-server-1:ssh-port ansible_ssh_user=username ip-server-2:ssh-port ansible_ssh_user=username ip-server-3:ssh-port ansible_ssh_user=username 现在可以按以下方式检查配置。 x – + Terminal $ ansible all -m ping --ssh-common-args='-o StrictHostKeyChecking=no' 见。 现在你可以执行playbooks或命令,例如重新启动所有服务器。 x – + Terminal $ ansible raspi -m shell -a 'sudo /sbin/reboot'
 -
难度等级: 很有运动精神
 今天我正在安装一个新的Kubenetes集群,有很多事情要做。 我已经为它订购了这些部件。 1x WDBU6Y0050BBK WD Elements portable 5TB: https://www.reichelt.de/wd-elements-portable-5tb-wdbu6y0050bbk-p270625.html? 3x风扇,双:https://www.reichelt.de/raspberry-pi-luefter-dual-rpi-fan-dual-p223618.html? 1x Raspberry 4 / 4GB Ram: https://www.reichelt.de/raspberry-pi-4-b-4x-1-5-ghz-4-gb-ram-wlan-bt-rasp-pi-4-b-4gb-p259920.html? 2xRaspberry 4 / 8GB Ram: https://www.reichelt.de/raspberry-pi-4-b-4x-1-5-ghz-8-gb-ram-wlan-bt-rasp-pi-4-b-8gb-p276923.html? 3个电源单元: https://www.reichelt.de/raspberry-pi-netzteil-5-1-v-3-0-a-usb-type-c-eu-stecker-s-rpi-ps-15w-bk-eu-p260010.html 1x 机架式:https://amzn.to/3H8vOg7 1x 600件杜邦插头套件:https://amzn.to/3kcfYqQ 1x绿色LED,带串联电阻:https://amzn.to/3EQgXVp 1x蓝色LED,带串联电阻:https://amzn.to/31ChYSO 10x Marquardt 203.007.013 Blanking piece 黑色: https://www.voelkner.de/products/215024/Marquardt-203.007.013-Blindstueck-Schwarz.html 1个灯座:https://amzn.to/3H0UZkG 我们走吧! 我在Raspian Lite安装的基础上创建了自己的安装镜像。我的用户/公钥已经存储在这个镜像中,"/boot/config.txt “文件已经为我的LED做了调整。 # meine Server brauchen kein HDMI, WLAN und Bluetooth dtoverlay=disable-bt dtoverlay=disable-wifi disable_splash=1 hdmi_blanking=1 hdmi_ignore_hotplug=1 hdmi_ignore_composite=1 # Status-LEDs an GPIO weiterleiten dtoverlay=act-led,gpio=21 dtparam=act_led_trigger=cpu0 服务器1 - 安装磁盘 首先,我在 “服务器1 “上安装一个NFS服务。这个存储以后可以用于我的容器集群。我将USB硬盘连接到 “服务器1”,并在这些说明的帮助下格式化了EXT4:https://homecircuits.
 -
难度等级: 可能需要更长的时间
 如果你想在某个温度下关闭树莓,那么你就来对地方了。我有一个脚本,通过Crontab检查CPU温度。 #!/bin/sh # This script reads the Broadcom SoC temperature value and shuts down if it # exceeds a particular value. # 80ºC is the maximum allowed for a Raspberry Pi. # Get the reading from the sensor and strip the non-number parts SENSOR="`/opt/vc/bin/vcgencmd measure_temp | cut -d "=" -f2 | cut -d "'" -f1`" # -gt only deals with whole numbers, so round it. TEMP="`/usr/bin/printf "%.
 -
难度等级: 人人可做如果你是104.6 RTL的粉丝,不想一天都没有柏林的热门电台,那么你就来对地方了。你需要一台名为树莓的单板计算机,以及GPIO端口4上的一根电缆作为天线。 需要以下软件包 x – + Terminal $ sudo apt-get update $ sudo apt-get upgrade $ sudo apt-get install sox libsox-fmt-all 我创建一个下载文件夹并下载PIFM脚本。 x – + Terminal $ mkdir /home/pi/installs $ cd /home/pi/installs/ $ wget http://omattos.com/pifm.tar.gz $ tar vfzx pifm.tar.gz pifm脚本 我创建了一个新文件"$vim /home/pi/radio-streamer.sh",内容如下。 #!/bin/bash pkill sox pkill pifm sleep 1 sox -v .9 -t mp3 http://stream.
-
难度等级: 很有运动精神如何将Gitlab运行程序作为Docker容器安装在我的Synology NAS上? 第1步:搜索Docker镜像 我点击Synology Docker窗口中的 “注册 “标签,并搜索Gitlab。我选择Docker镜像 “gitlab/gitlab-runner”,然后选择标签 “bleeding”。 第2步:将图像投入运行。 主机问题 我的synology-gitlab-insterlation总是只用主机名来识别自己。由于我从软件包中心提取了Synology Gitlab的原始软件包,所以这个行为在之后无法改变。 作为一种变通方法,我可以包括我自己的hosts文件。在这里你可以看到,主机名 “peter “属于Nas的IP地址192.168.12.42。 127.0.0.1 localhost ::1 localhost ip6-localhost ip6-loopback fe00::0 ip6-localnet ff00::0 ip6-mcastprefix ff02::1 ip6-allnodes ff02::2 ip6-allrouters 192.168.12.42 peter 这个文件只是存储在Synology NAS上。 第3步:设置GitLab运行器 我点击了我的亚军图像。 我激活了 “启用自动重新启动 “的设置。 然后我点击 “高级设置”,选择 “音量 “标签。 我点击添加文件,并通过路径”/etc/hosts “包括我的hosts文件。只有在主机名不能被解决的情况下,才有必要进行这一步骤。 我接受设置并点击下一步。 现在我在Container下找到了初始化的图像。 我选择容器(对我来说是gitlab-gitlab-runner2)并点击 “详细信息”。然后我点击 “终端 “标签,创建一个新的bash会话。我在这里输入 “gitlab-runner register “命令。对于注册,我需要在我的GitLab安装中找到的信息,在http://gitlab-adresse:port/admin/runners。
-
难度等级: 可能需要更长的时间智能电视可能是定时炸弹。通常情况下,电视操作系统含有严重的漏洞,或者没有保持最新状态。一个好的解决方案可以是一个独立的MediaPC操作系统。LibreElec在最弱的树莓上运行,可以用电视的遥控器控制。LibreElec比SmartTv操作系统更容易定制,并提供各种应用/模块。你只需要一个RaspberryZeroW和一张空白SD卡。 步骤1。 从https://www.raspberrypi.org/downloads/noobs/ 下载Noobs安装程序。 第2步。 在空的SD卡上解压这个压缩文件。 “ ” 完成了!现在你可以把RaspberryPiZero连接到电视上。然后你会看到安装菜单。 “ ” 现在请选择 “LibreElec RPI “并点击 “安装”。 “ ” 在这之后,安装完成并可启动 “ ” 现在你可以将这个MediaPc连接到外部资源,如NAS或安装Youtube等应用程序。玩得开心! “ ” 正如已经写过的,你也可以通过CEC控制器使用你的电视遥控器。
-
难度等级: 真的很苛刻
 如何为Bamboo、Jenkins或Gitlab创建一个构建监视器?我今晚就能想出办法来!我已经写过一个类似的Gitlab问题板教程。 本教程的基础是Raspberry Imager和 “Raspberry Pi OS Lite “操作系统。安装完操作系统后,可以将SD卡插入树莓中。在我的例子中,这是一个Raspberry Pi Zero。 第1步:安装火柴盒/窗口管理器 要在信息亭模式下操作树莓,需要一个窗口管理器和一个浏览器。这些都是用以下命令安装的。 x – + Terminal $ sudo apt-get install xorg nodm matchbox-window-manager uzbl xinit unclutter vim 第2步:我创建一个仪表板用户 通过以下命令,我创建了一个名为 “dashboard “的新用户。 x – + Terminal $ sudo adduser dashboard 第3步:配置xServer和窗口管理器 以下所有步骤必须在 “仪表板 “用户会话中进行。我改用 “su “的会话。 x – + Terminal $ sudo su dashboard